Imagine you have data coming in from an IoT device, e.g. a temperature sensor, and you want to visualize the values. You also want your frontend to live-update as soon as new data arrives. You could use something like Grafana or IoT Central, but then you are stuck in an existing UI and cannot influence the user experience very much. ux4iot gives you complete freedom over the user interface, while making access to IoT data very easy.
It‘s basically a pretty direct connection from your frontend to your devices (via Azure IoT Hub — ok, so it’s actually not a direct connection, but it feels like one). For React, you get a hook called useTelemetry so that every time a new temperature value arrives, your local state is updated and your components are re-rendered.
Sounds promising? Alright, let’s try it out.
The easiest way to setup a ux4iot instance is by going to the quick-start repo and pushing the “Deploy to Azure Button”. This will take you to the deployment page where you can select the Resource group and region to deploy to.
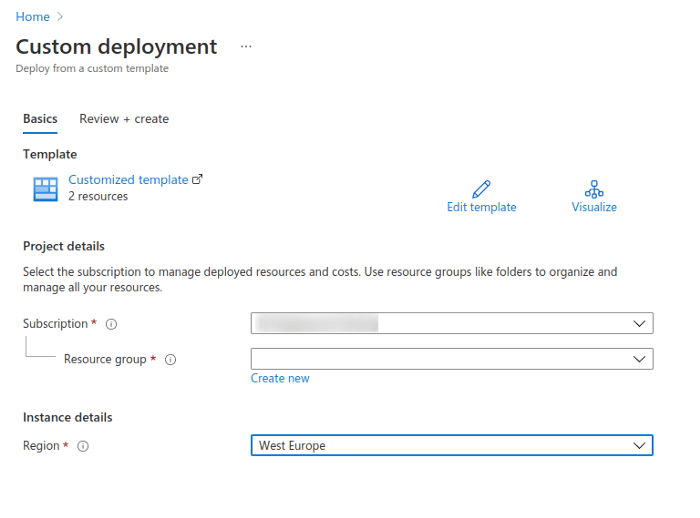
After you hit “Create” it takes a couple of minutes until the deployment is complete. The result is a new Azure IoT Hub and a ux4iot instance. Both are already wired together, so no additional configuration is necessary.
You should see the both IoT Hub and the ux4iot instance in the Azure Portal:

We now need a React application. This is easily accomplished by using create-react-app (if you do not want to perform the steps yourself, you can find the finished project on GitHub):
npx create-react-app temp-visualizer
The ux4iot-react NPM package must be added the project:
cd temp-visualizer
npm install ux4iot-react
Replace the file App.js with this:
import './App.css';
import {Ux4iotContextProvider, useTelemetry} from "ux4iot-react";
const UX4IOT_ADMIN_CONNECTION_STRING = 'YOUR_ADMIN_CONNECTION_STRING';
const TemperatureView = props => {
const temperature = useTelemetry('simulated-device', 'temperature');
return <div>{temperature}</div>;
}
function App() {
return (
<div className="App">
<Ux4iotContextProvider
options={{ adminConnectionString: UX4IOT_ADMIN_CONNECTION_STRING }}
>
<TemperatureView />
</Ux4iotContextProvider>
</div>
);
}
export default App
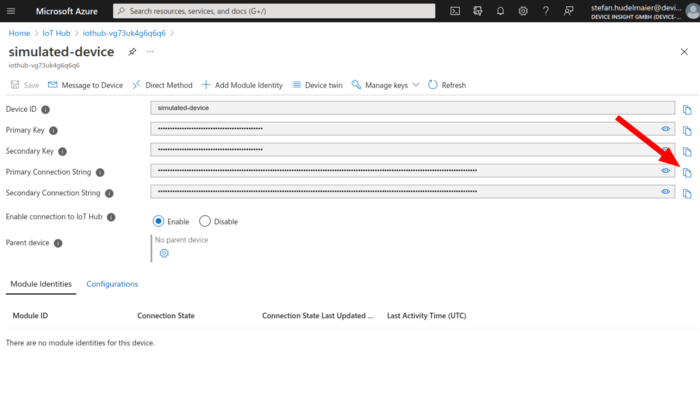
Nothing fancy, it just displays the most recent temperature value in a div . Retrieve the connection string from the Azure Portal (see screenshot below) and insert it in line 5.

Now, you can start the React application locally:
npm run start
All that’s missing now is some data. Let’s create some.
I have built a very simple simulator of a temperature sensor that sends a value to IoT Hub every 3 seconds. You can start it with Docker:
Now, you can start the React application locally:
docker run --rm -ti \
-e DEVICE_CONNECTION_STRING="HostName=..." \
ghcr.io/stefan-hudelmaier/simulated-temperature-sensor:main
Create a device called simulated-device in the IoT Hub that you deployed earlier. Copy the connection string of the device and use it as the value of the DEVICE_CONNECTION_STRING environment variable in the snippet above.
The temperature sensor simulator will start sending data. You should see the value automatically updated in the React application.

While it admittedly looks rather plain, I hope you see the potential: You can design the UI any way you want and still have convenient access to live IoT data.
Subscribing to telemetry values is only one feature of ux4iot, it can also be used for Direct Methods, Device Twin management, monitoring the online state of a device, etc. I will cover these in a future post. The same goes for the access control aspects, which we have ignored in this introduction to ux4iot as well.
You can find the end result of the described steps on GitHub. And some further reading: